Need help installing your Navien tankless water heater? Get all your questions answered!
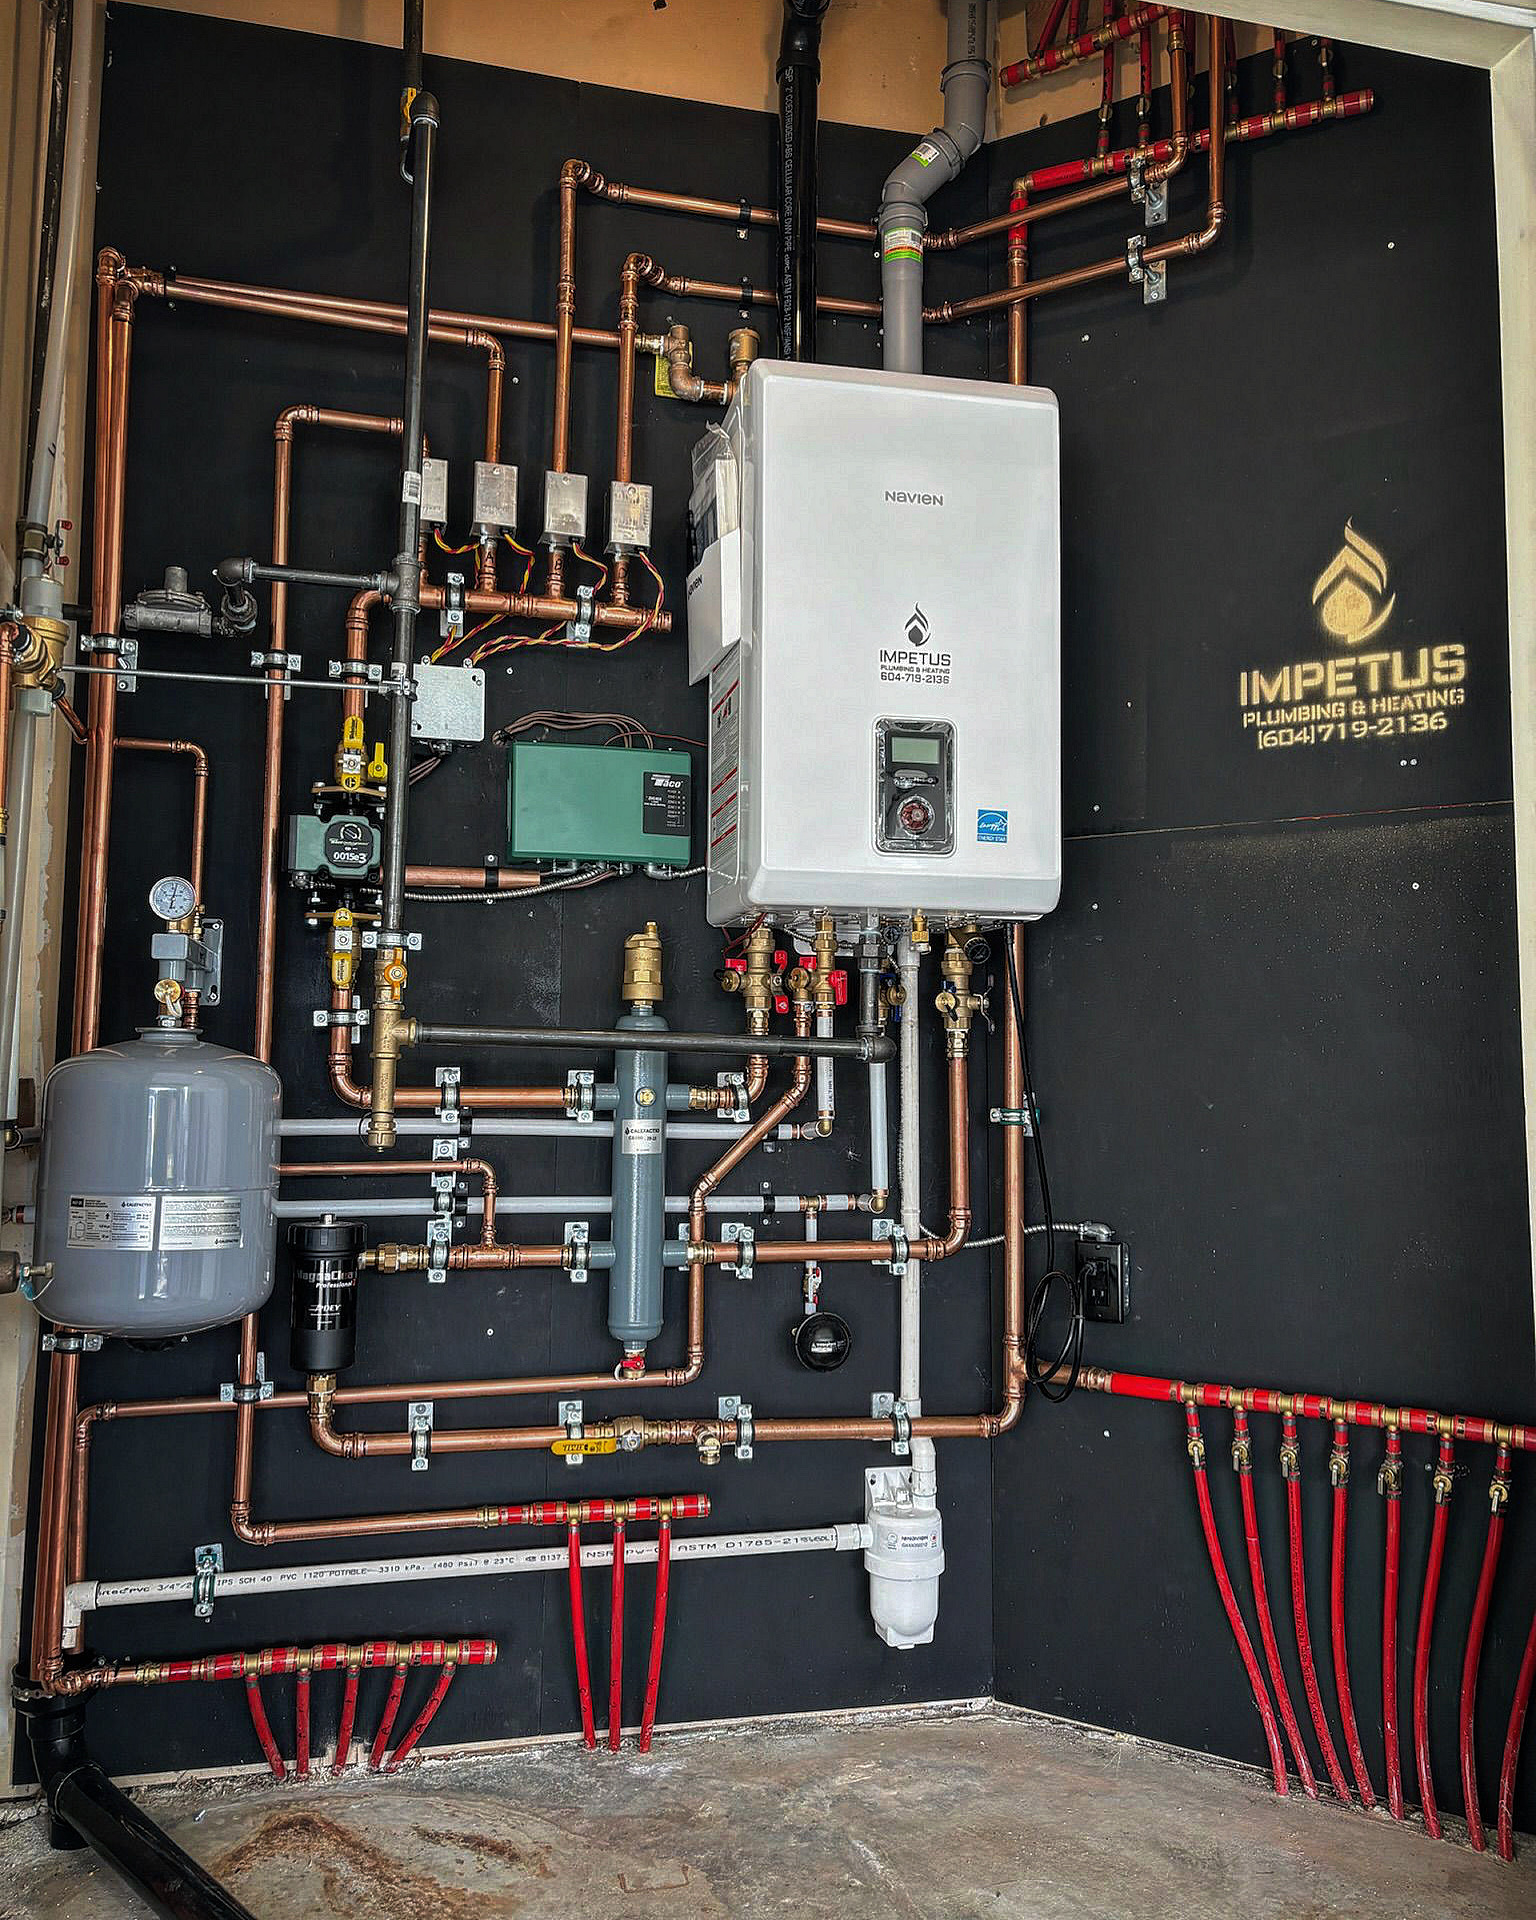
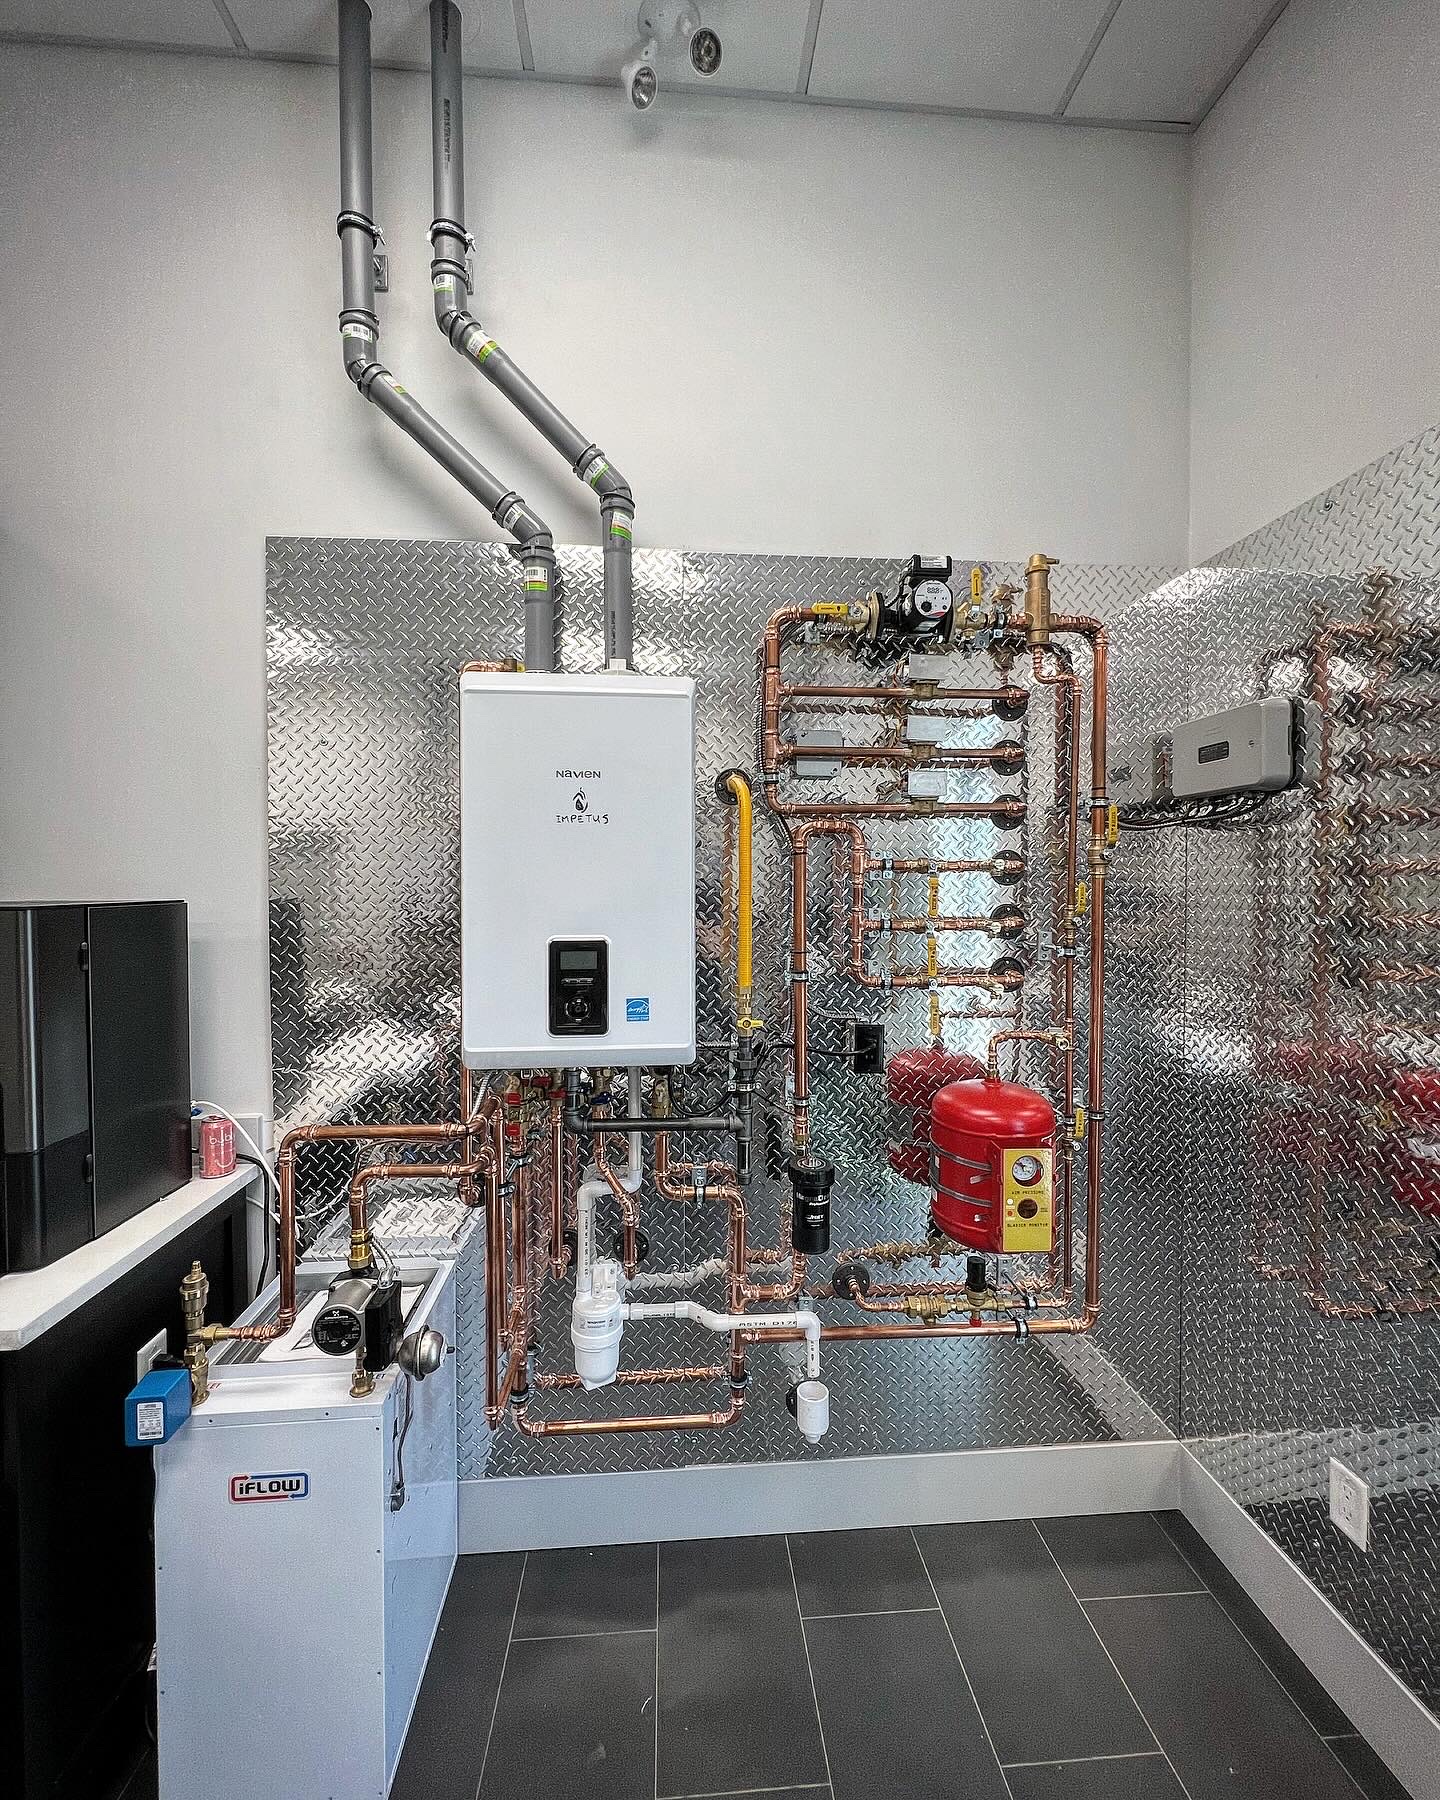
At Impetus Plumbing, we are masters of Navien tankless installation, providing a reliable water heater system that works at peak performance all year round. This professional knowledge means we understand what matters before, during, and after the installation time.
Why Navien Is Different From Other Tankless Brands
The main differentiation of Navien tankless water heaters is their efficient performance and reliability. These heat exchangers are also known as condensing tankless water heaters, which means they use less energy by using stainless steel coils to transfer heat from the burner to water, but only when you need it.
You get lower utility bills, quiet operation, endless hot water, and a corrosion-resistant system you can rely on. In addition, when properly installed, it comes with a strong manufacturer’s warranty: up to 15 years, depending on the model and application.
Pre-Installation Checklist
Before starting your Navien tankless hot water heater installation, here are the necessary tools and components:
- Installation and operation manual
- Approved vent piping for intake and exhaust
- Proper vent terminations and fittings
- Gas piping sized to meet Navien flow and pressure requirements
- Main gas shutoff valve and sediment trap
- Cold and hot water isolation valves
- Condensate drain kit and neutralizer, if required
- Mounting bracket and wall fasteners
- Electrical connection and dedicated outlet, if needed
- Tools such as pipe cutters, drill, level, pressure gauge, and combustion analyzer
Additional documentation is also required for this type of work, including:
- Plumbing permit
- Gas permit
- Meet local plumbing and gas codes
For professional installation that follows all requirements, visit.
Step-by-Step Navien Installation Guide
Choosing an Installation Location
Start the installation process by choosing a wall that has clear access and supports your tankless water heater unit’s weight, with proper venting to the outside, meeting requirements and clearance rules.
Mounting the Water Heater to the Wall
Nail the wall bracket using the trapping screws and anchors provided by the manufacturer. Hang the tankless water heater, verifying if it’s perfectly level before tightening the screws to ensure it’s firm. Proper mounting prevents noise, vibration, and future issues.
Connecting the Gas Supply
First, determine the gas type and pressure for your unit, then perform a pressure test on the main gas line and remove any debris. Follow the manufacturer’s table to determine the right gas line pipe size. Following, you must install a shutoff valve both on the gas line and the water heater, so you can connect them safely and test the connection.
Connecting the Water Supply
Connect the water supply to your heater by installing isolation valves on both the cold and the hot lines to the inlet and outlet, respectively. Tighten the connections and check for leaks before moving to the next step.
Connecting the Condensate Drain
As mentioned before, the Navien tankless unit is a condensing tankless water heater, which means it produces an acidic condensation (pH of 3 – 5) that needs to be safely drained. To do it, attach the drain to the bottom outlet and check local codes for disposal.
Venting for Combustion Air
Installation instructions for combustion air venting vary based on the tankless water heater model. Always follow length limits, slope requirements, and termination clearances as indicated in the product’s manual to avoid recirculation and unsafe operation.
Connecting the Power Supply
After ensuring all plumbing and gas piping connections are complete, plug your new system into a grounded, dedicated 120 VAC, 60 Hz outlet for stable power. Never connect it to a 220 – 240 V AC power supply.
Setting the DIP Switches
Locate the DIP switches on the circuit board and adjust them according to the gas type, vent length, and installation setup you have. Refer back to the product’s manual to prevent incorrect settings that lead to failures and efficiency loss.
Common Installation Mistakes to Avoid
If you have a recent Navien tankless water heater installation in your property and are already facing issues, it’s likely an installation mistake. Watch out for these specific mistakes:
- Not sizing the gas line for the unit’s full BTU demand and confirming inlet pressure under load.
- Fail when meeting vent length limits and termination clearances exactly.
- Forgetting to slope the drain downward and install a neutralizer when required.
- Positioning the switch wrongly for the gas type or vent length.
- Neither cleaning debris from the pipes nor flushing the lines before connecting the unit.
- Using a shared, non-isolated power source.
Avoiding these mistakes protects performance, efficiency, and long-term reliability. If you have questions, check the Navien installation manual.
Post-Installation Tips
To ensure an efficient installation and a long lifespan, there are a few final steps you can follow:
- Always check the manual for references.
- Check all the connections, including water, gas, venting, electrical, and condensate lines, focusing on leaks and loose-fitting.
- Run the unit for ten minutes, then shut it down to clean the cold water and recirculation filters.
- Perform a stress test to confirm stable temperature, pressure, and proper flow by running hot water at several fixtures at the same time.
- Watch the control panel for error codes during the first full heat cycle.
- Avoid extreme settings that strain the heat exchanger.
- Register for warranty coverage once the installation is complete.
- Perform routine maintenance to catch problems before they turn into expensive repairs or full replacements.
Maintenance After Installation
A regular maintenance schedule is the key when keeping your Navien tankless water heater reliable for years. Plan a full service at least once a year.
The licensed plumber will complete a heat exchanger flushing to remove any potential buildup that reduces efficiency. They will also clean the water filter, inspect the condensate drain, confirm proper flow, check vents, inspect connections, and test pressure as part of the maintenance services.
This professional service protects the internal parts of your unit, as well as prevents error codes and the voiding of your warranty.
DIY vs. Professional Navien Installation
DIY installation may look appealing, but it actually offers only one potential benefit: saving costs. However, the risks are big, as Navien systems demand precision.
Plumbing and gas line services must match strict installation requirements and comply with codes. Small mistakes not only trigger system error codes, but also lead to dangerous situations such as gas leaks, reduced water heater efficiency, and void Navien warranty coverage.
Here’s a quick table for comparison:
| Installation Type | Pros | Cons |
| DIY Installation | Lower upfront cost; Hands-on control of the process. |
High risk of gas, venting, or condensate errors; Common error codes and startup failures; Warranty issues if standards are not met; Permits and inspections still required. |
| Professional Installation | Code-compliant installation; Correct gas sizing and venting; Proper startup and testing; Warranty protection and documentation. |
Higher initial cost compared to DIY. |
To enjoy endless hot water provided by a Navien tankless water heater installation, always look for an Impetus Plumbing and Heating’s licensed plumber and gas fitter who meets local codes, follows Navien standards and ensures a safe operation.